amigurumi · free-pattern · beginner · 7 min read
Crochet Pikachu Pattern (Amigurumi, Beginner Friendly)
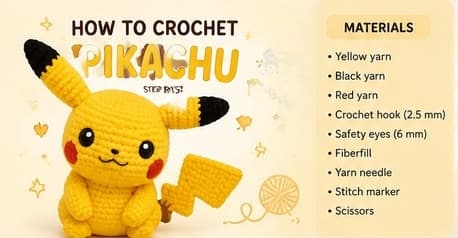
This is a fan-made pattern for a Pikachu-inspired amigurumi, not an officially licensed design — Pikachu is a trademark of Nintendo, Game Freak, and The Pokémon Company. The construction itself is nothing new if you've made the amigurumi bunny on this site: single crochet throughout, standard magic-ring shaping for the body, and thin unstuffed tubes folded flat for the ears and limbs. The one genuinely different technique here is the tail — instead of shaping it in the round, you crochet four small flat rectangles back and forth and sew them together into a zigzag.
Abbreviations
- mr — magic ring
- sc — single crochet
- inc — increase (2 sc in 1 stitch)
- dec — decrease (invisible: sc2tog)
- ch — chain
- st(s) — stitch(es)
- R — round (or row, for the flat tail segments)
- ( ) — work the instructions inside the parentheses the number of times given
Materials
- Yellow yarn
- Black yarn
- Red yarn
- 2.5mm crochet hook
- 6mm safety eyes
- Fiberfill stuffing
- Yarn needle
- Stitch marker
- Scissors
Head & body (yellow, one continuous piece)
Work in continuous rounds, without joining or turning, starting from a magic ring.
- Magic ring, 6 sc into the ring. (6)
- Inc around. (12) — 2 sc into every stitch from round 1.
- (sc, inc) x 6. (18)
- (2 sc, inc) x 6. (24)
- (3 sc, inc) x 6. (30) — the piece's widest point. 6–11. Sc around, no increases. (30) — repeat for 6 rounds, giving the body its rounded, egg-like height before you start closing it off.
- (3 sc, dec) x 6. (24) — sc across 3 stitches, then work an invisible decrease over the next 2 to merge them into one; repeat 6 times.
- (2 sc, dec) x 6. (18)
- (sc, dec) x 6. (12)
- Dec around. (6)
Stuff firmly as the opening narrows, then close the hole and weave in the tail.
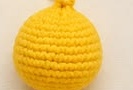
Ears (make 2)
Worked as a thin straight tube, with no shaping beyond the initial magic ring — the ear's pointed look comes entirely from folding it flat and closing the tip, not from decreases.
- Magic ring, 6 sc into the ring. (6) 2–6. Sc around, no increases. (6) — repeat for 5 rounds, in yellow.
Change to black.
7–9. Sc around, no increases. (6) — repeat for 3 rounds.
Fold the tube flat and crochet 3 sc across the opening to close it, leaving a long tail for sewing.

Arms (make 2, yellow)
Same thin-tube technique as the ears, just without the color change.
- Magic ring, 6 sc into the ring. (6) 2–7. Sc around, no increases. (6) — repeat for 6 rounds.
Flatten the tube and crochet 3 sc across the opening to close it.
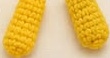
Legs (make 2, yellow)
- Magic ring, 6 sc into the ring. (6)
- (sc, inc) x 3. (9) — sc in one stitch, then 2 sc in the next, repeated 3 times to widen the tube slightly. 3–4. Sc around, no increases. (9) — repeat for 2 rounds.
Flatten and crochet 4 sc across the opening to close it.

Tail (yellow, plus a brown base)
The tail is the one piece on this pattern that isn't worked in the round. Instead, you make four small flat strips and sew them together afterward into a zigzag.
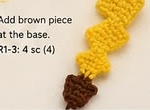
Starting with yellow, chain 3 and turn. Work 2 sc into the 2nd chain from the hook, then 1 sc into the next chain (2 sts per row). Repeat this same 2-stitch row for rounds 1–9. Make 4 of these flat strips.
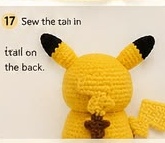
Sew the 4 strips together as shown in the photo below, offsetting each one from the last so the strips zigzag into a lightning-bolt silhouette rather than stacking into a straight column.
Once assembled, add a small brown accent piece at the base, where the tail will attach to the body: work 3 rounds of 4 sc, with no increases or decreases (4).
Assembly
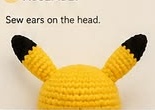
- Sew the ears onto the head.
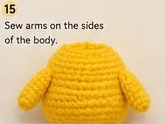
- Sew the arms to the sides of the body.
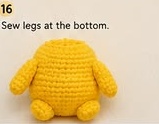
- Sew the legs to the bottom of the body.
- Sew the tail onto the back of the body, positioned low, near the base of the spine.
- Attach the safety eyes, embroider the mouth, and sew small red cheek marks below the eyes.
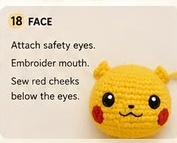
Finished result
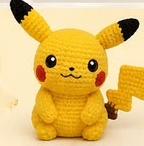
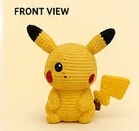
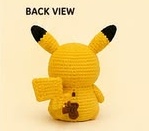
Tips for success
- The ears, arms, and legs are all worked as plain unshaped tubes — keep your tension consistent across all of them so the finished pieces match in width even though there's no stitch count to check them against.
- Stuff the head-and-body piece as you go, packing a little more in with each round as the opening narrows, rather than trying to fill it all at once at the very end.
- When sewing the 4 tail strips together, dry-fit them against the photo before stitching — it's much easier to adjust the zigzag offset before anything is sewn than after.
- Use a stitch marker on the head-and-body piece; at 15 rounds it's the easiest part of this pattern to lose count on.
If magic rings or invisible decreases are new to you, the magic ring tutorial walks through the same shaping used here in more detail on a simpler single-piece project.
Frequently Asked Questions
Is this an official Pikachu pattern? No — this is an independent, fan-made amigurumi pattern inspired by Pikachu's design. It isn't licensed or endorsed by Nintendo, Game Freak, or The Pokémon Company, and it's shared here as a personal-use tutorial the way many fan-made crochet character patterns are.
How long does this pattern take to make? With no complex color-work and mostly straight-tube pieces (ears, arms, legs), this is one of the quicker amigurumi on this site — a couple of focused evenings is realistic for a first attempt, faster on a repeat make.
Can I substitute the yarn weight or hook size? Yes — worsted weight yarn on a hook one size up from what's listed (around 3.5–4.0mm) will produce a noticeably larger finished piece with the exact same stitch counts, similar to how the amigurumi panda scales with hook size. A smaller hook and thinner yarn produces a more delicate miniature version.
Is this safe for a young child or a pet? The 6mm safety eyes are a choking hazard for children under 3 and for pets that chew on toys — substitute embroidered eyes in black yarn or floss for either. The unstuffed, flattened ears, arms, and tail segments also have less structural bulk than a fully stuffed piece, so reinforce the seams with a few extra passes of yarn if the toy will get regular rough handling.
Why are the ears and arms just plain tubes instead of shaped pieces? Skipping increases and decreases on the ears and arms keeps them thin and flat once folded, which matches Pikachu's proportions better than a rounded, stuffed limb would — it's a deliberate simplification rather than a shortcut, and it also makes these the fastest pieces in the whole pattern to crochet.
Keep going
- 01Crochet Tom Keychain Pattern (Amigurumi, ~10cm)A fan-made cartoon-cat keychain in fine 2.0mm gauge — the same magic-ring shaping as every other amigurumi on this site, just worked small and finished with a keychain ring instead of a hanging loop.amigurumi8 min read
- 02Crochet Raccoon Pattern (Amigurumi, 7–8in)A bottom-up body with a built-in cream belly stripe, a striped tail worked in alternating color bands, and oval eye masks made from a foundation chain instead of a magic ring — more construction variety than most first amigurumi projects.amigurumi10 min read
- 03Crochet Panda Pattern (Sitting Amigurumi, 18–20cm)A bigger, more detailed panda than most beginner patterns — a two-tone head with eye patches, a separate nose, and toe-pad paws that make it sit up on its own. Single crochet throughout, worsted weight yarn.amigurumi11 min read